Working with LTMOM
By Imran, Mohammad | February 28, 2023 | Under LTMC
While working on data migration using LTMC, you may encounter a scenario where a required field is not available in the LTMC template or corresponding structure. In such cases, the LTMOM (Legacy Transfer Migration Object Modeler) tool becomes essential. LTMOM is an inbuilt feature in S4HANA that allows you to customize LTMC objects—such as adding, removing, or modifying fields as needed.
Before attempting to add a new field, ensure that the field exists in the target structure of the respective migration object.
Steps to Use LTMOM
- Execute Transaction Code LTMOM. This will launch the LTMOM interface within S4HANA.
- Select the appropriate project you were working on and locate your migration object.
- Once the object is open, double-click on the Target Structure.
- On the right panel, double-click the segment where you wish to add the field (e.g., Purchasing Org).
-
Check if the desired field is available in the segment:
- If the field is available: You can proceed with the addition.
- If the field is not available: You will need to coordinate with the ABAP team to enhance the functional module associated with the object. Be aware that this is often discouraged, as modifying standard functionality can be complex and risky.
As an alternative, if the field cannot be added via LTMOM due to technical constraints, consider using LSMW (Legacy System Migration Workbench) to update the field after the data is loaded through LTMC.

At this point, you’ve confirmed that the field you want to add is available in the target structure. You can now proceed with the next steps in LTMOM. Follow the instructions below:
- Double-click on the Source Structure and switch to edit mode.
- Navigate to the segment where you want to add the field. In this example, the segment is Purchasing Org. Double-click on the segment to view its list of fields.
- Click on the Add Field icon to insert a new field. In this case, we are adding the NETPR field.

- You will see that the NETPR field has been successfully added along with the appropriate data type.

Once the field has been added to the source structure, the next step is to map the field to its corresponding target field.
- Double-click on Field Mapping and navigate to the segment where you want to map the newly added field.
- Locate the field within that segment. If you see a red cross icon next to it, it indicates that the field is not yet mapped.
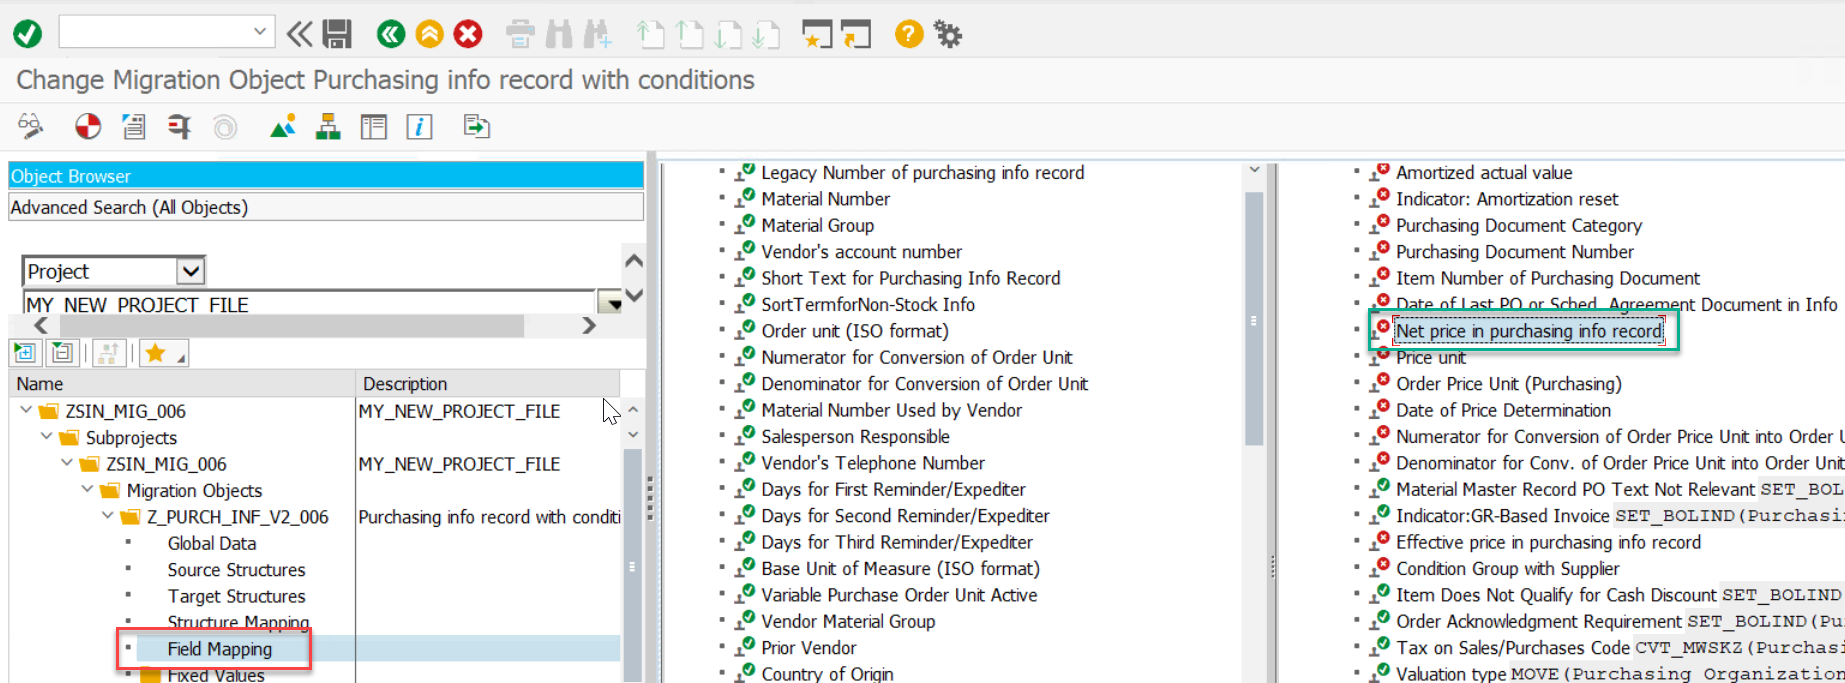
- Double-click on the unmapped field to begin the mapping process. Configure the mapping as shown below.
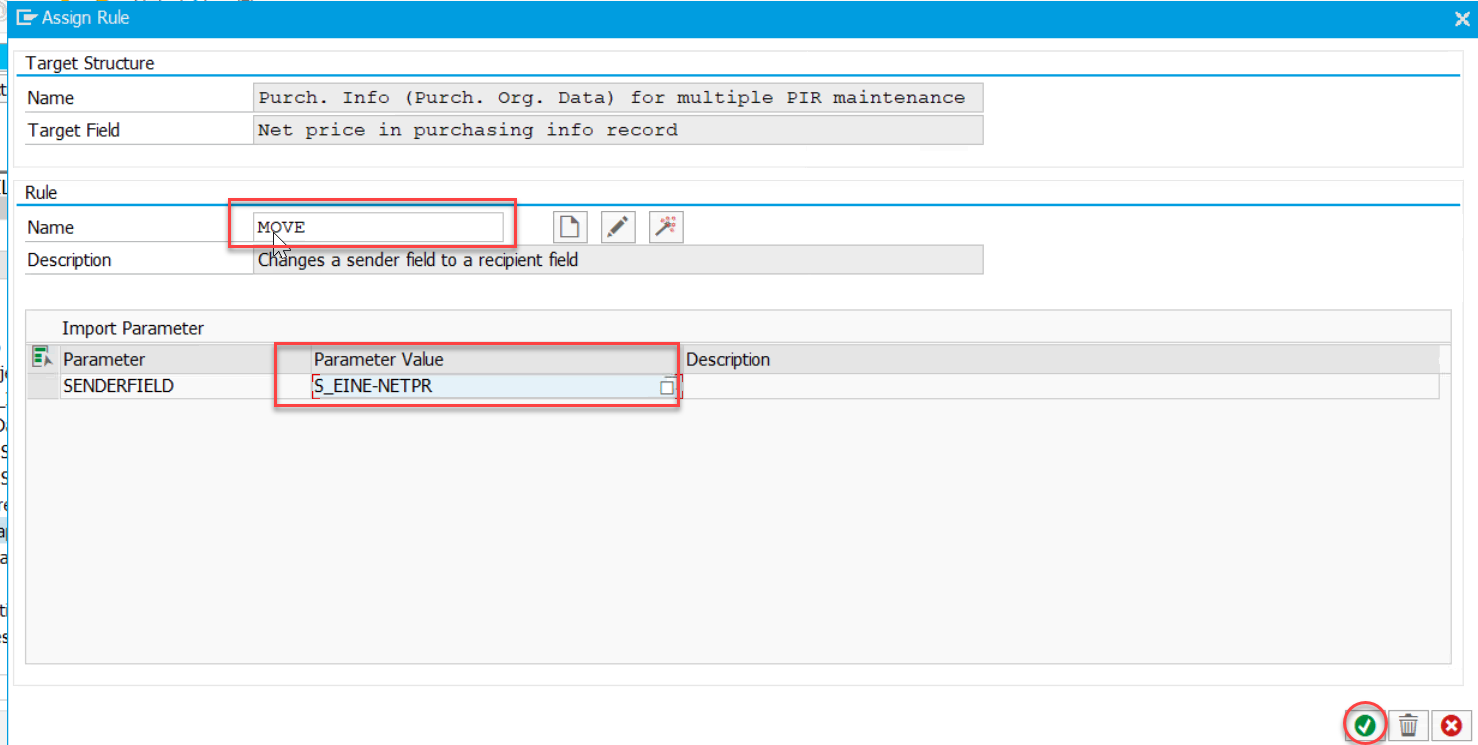
- Once the field is mapped, the red cross icon will change to a green tick, indicating that the mapping has been completed successfully.
-
Click on
 Generate Runtime Parameter. This action will update the status from
Not Generated to Generated.
Generate Runtime Parameter. This action will update the status from
Not Generated to Generated.

Next, go back to the LTMC screen and re-download the migration template. You will now notice that the newly added field appears in the template. Enter the required data and begin the migration process.
