Loading an Object Using File-Based LTMC
By Imran, Mohammad | February 16, 2023 | under LTMC
LTMC provides a file-based approach for loading data into S4HANA. The availability of prebuilt templates for various objects simplifies the data migration process, particularly for small-volume datasets. To begin, simply download the relevant template, populate it with your data, upload it to the LTMC portal, and proceed with the loading process.
The first step is to execute the transaction code (t-code): LTMC. Ensure that you are executing this transaction from the appropriate client where the data is to be uploaded.
Upon execution, the LTMC interface will open in your browser. Follow the instructions outlined in the next section.
Create a Project
If a project has already been created, you may reuse it—provided the Data Source is set to File. However, if you prefer to maintain separate projects for different migration tasks, you can create a new one as shown below.
Click on Create.
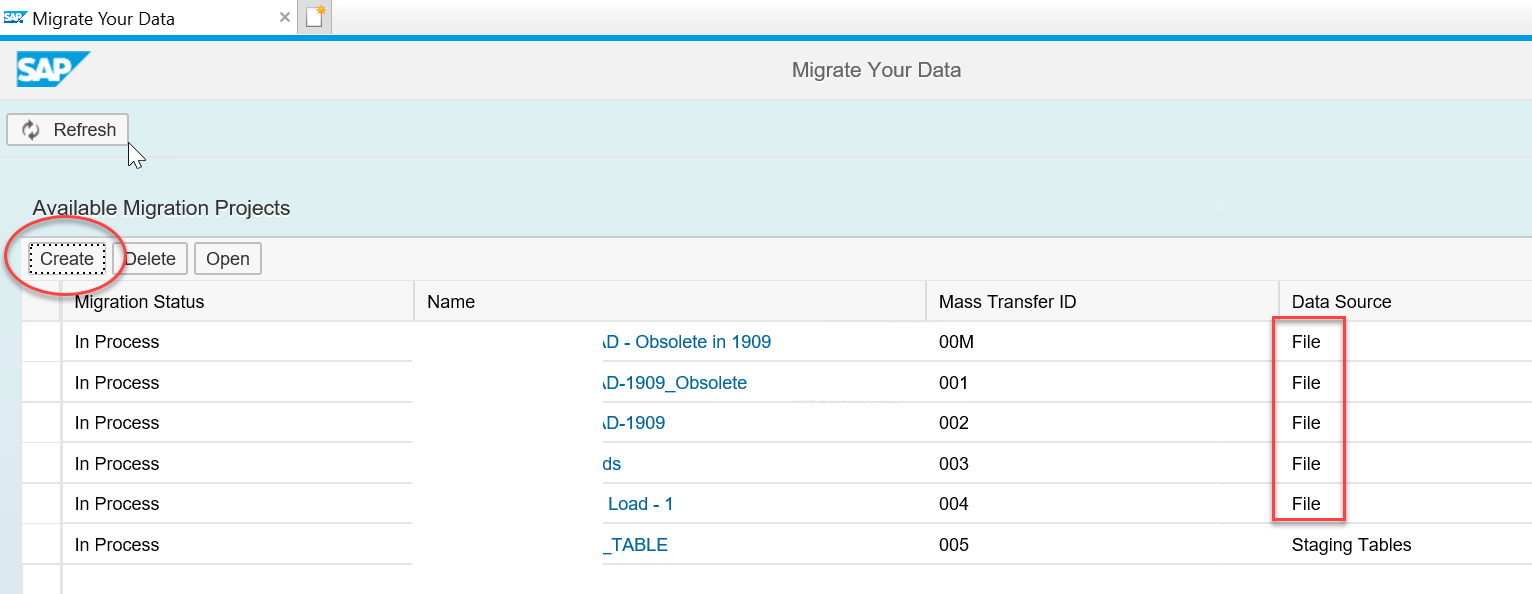
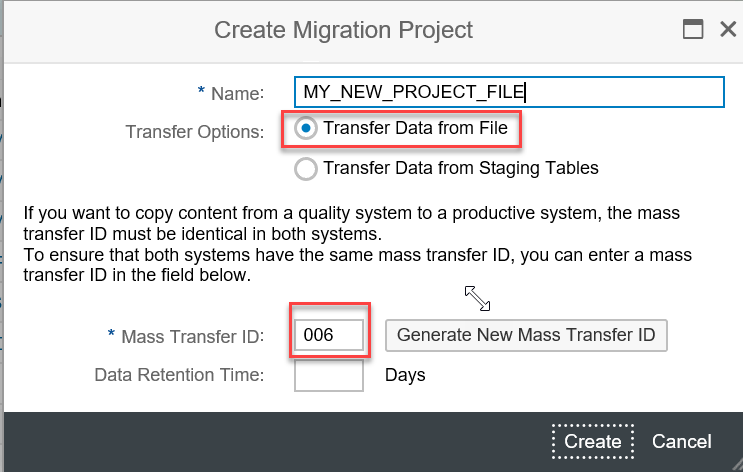
- Provide a suitable name for your project.
- Select the option Transfer Data from File.
- Ensure that a Mass Transfer ID is generated. This ID is necessary if the project needs to be transported to another environment. Click Create to proceed.
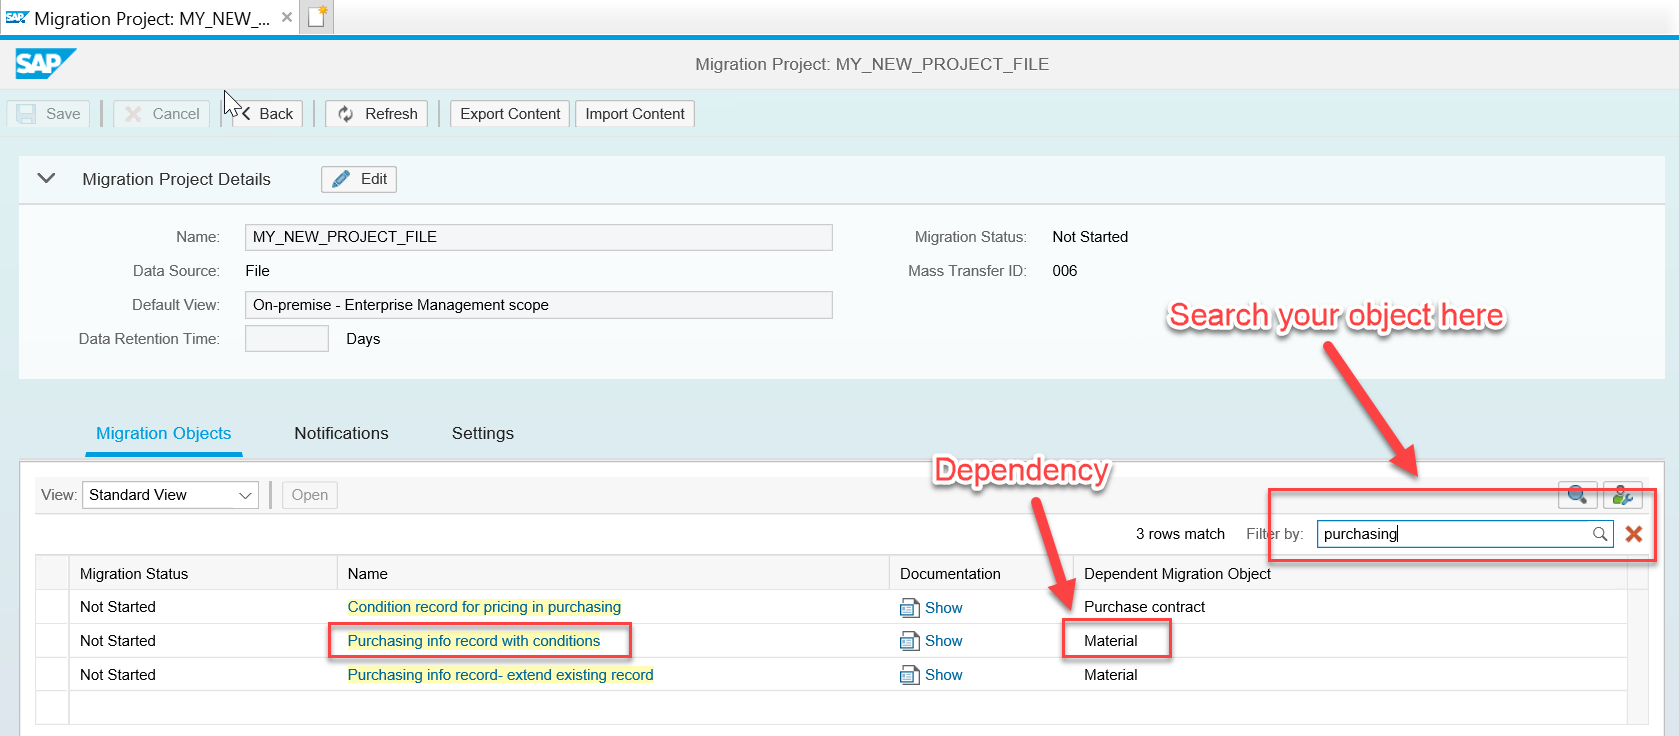
Once a project is created, all associated objects will be linked to it. Therefore, there is no need to create a new project when switching to a different object load.
Now, let's begin exploring how to load an object using the file-based LTMC approach.
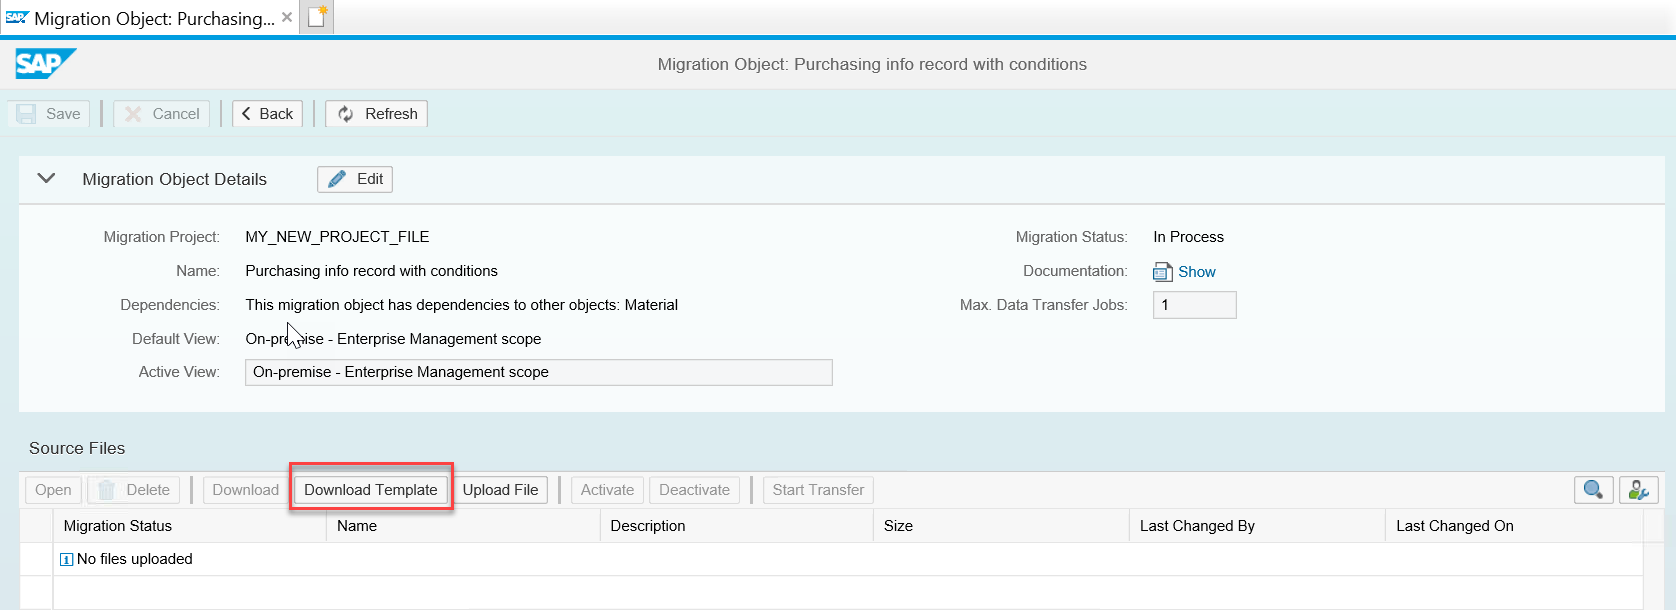
1. Download the Template
Once the project has been created, you can search for and download the template corresponding to the object you wish to migrate to S4HANA.
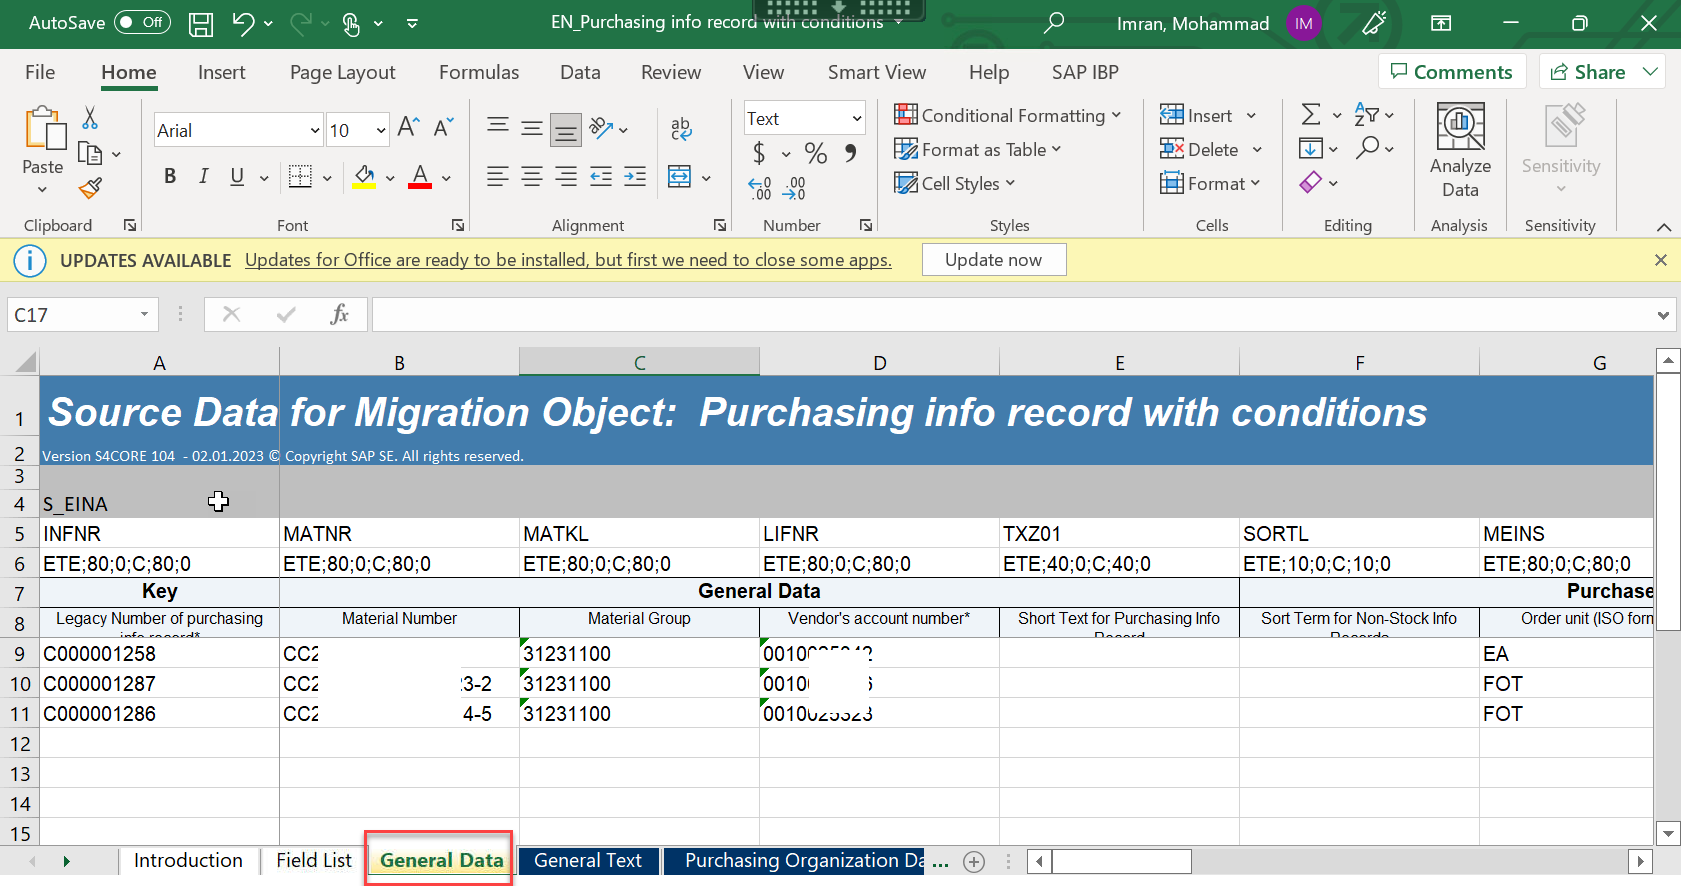
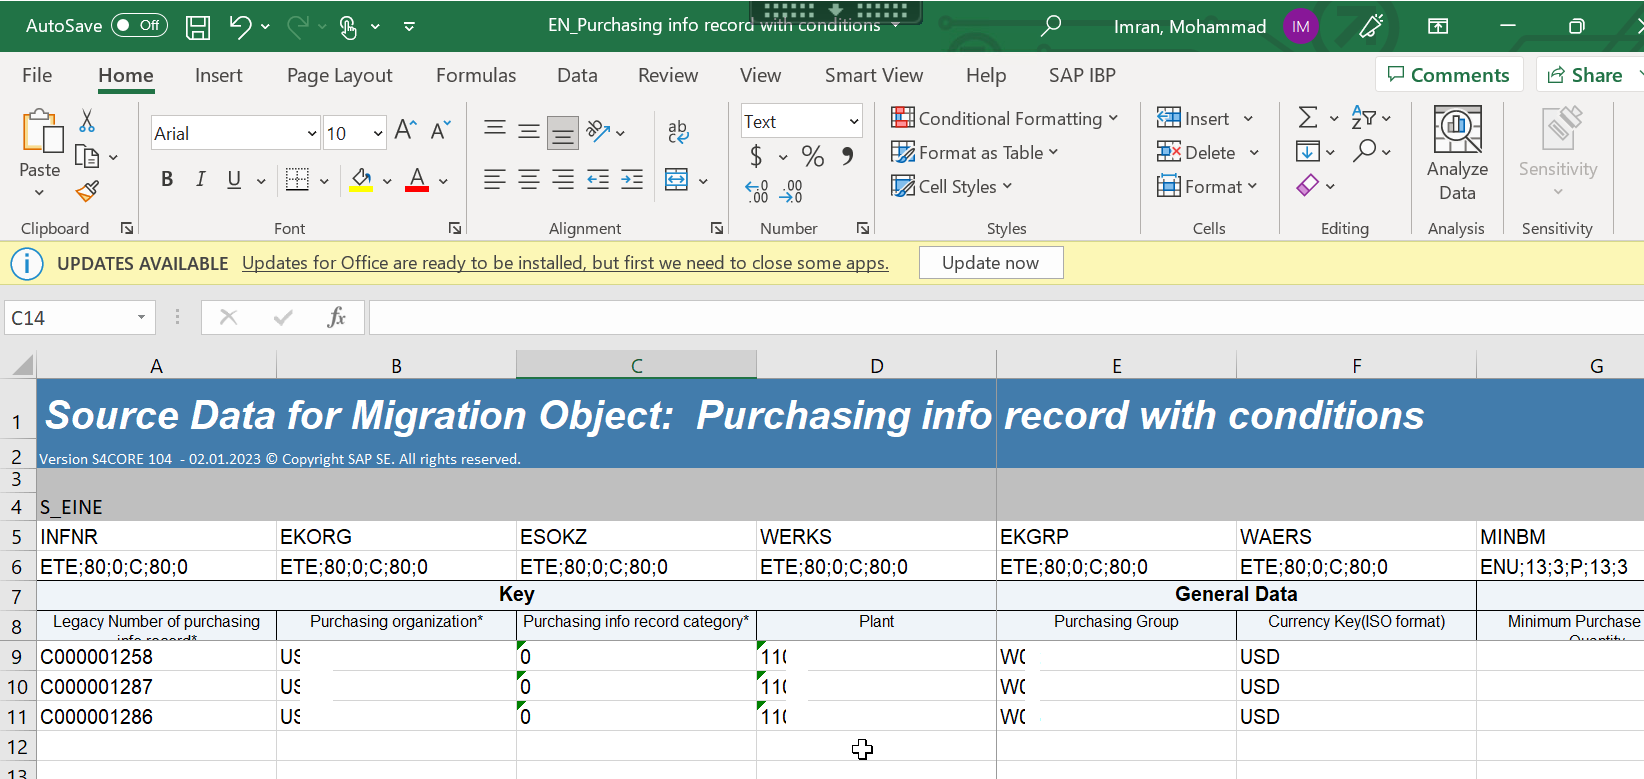
2. Fill the Template
Open the template you have downloaded and perform the following activities:
- Review the tabs and identify the list of fields required for your migration.
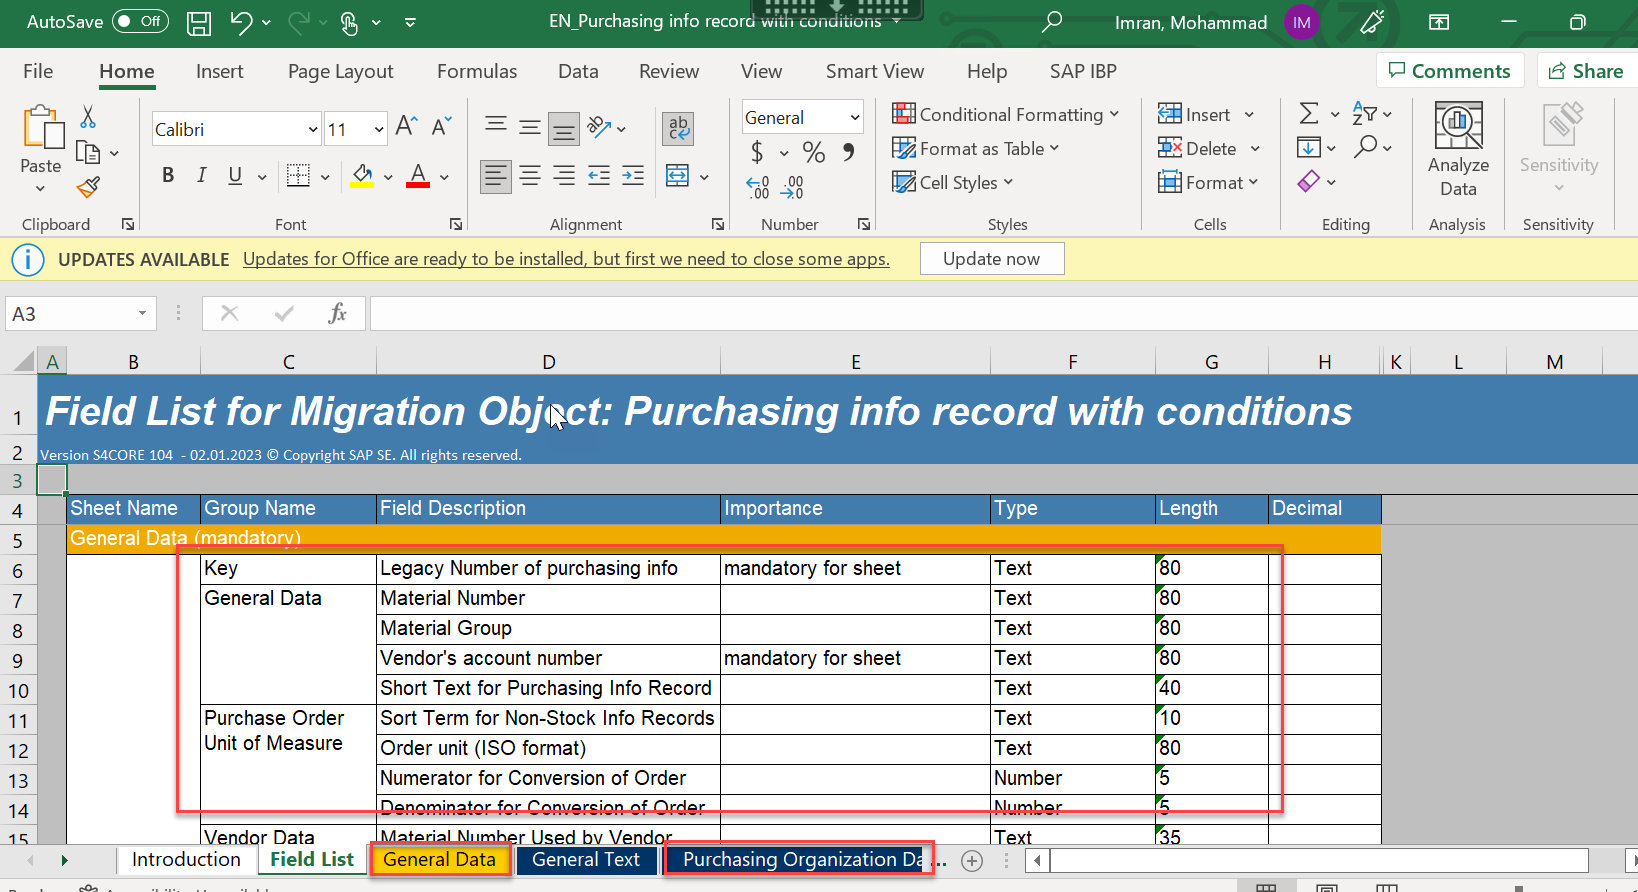
- Tabs highlighted in yellow are mandatory and cannot be left blank. Tabs in blue are optional and may be left blank if they are not in scope for your migration.
- Fields marked with an asterisk (*) are mandatory. You will notice an asterisk at the end of the field description indicating this requirement.
- Save the template once all necessary data has been entered.
3. Upload the Template
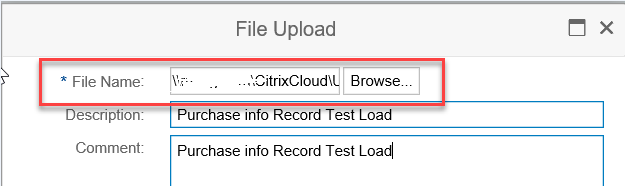
After filling in the required data, you can now upload the template to the portal.
- Click on Upload and browse for the file. During the upload process, you may encounter errors such as missing data in mandatory tabs, blank mandatory fields, or incorrect field positions.
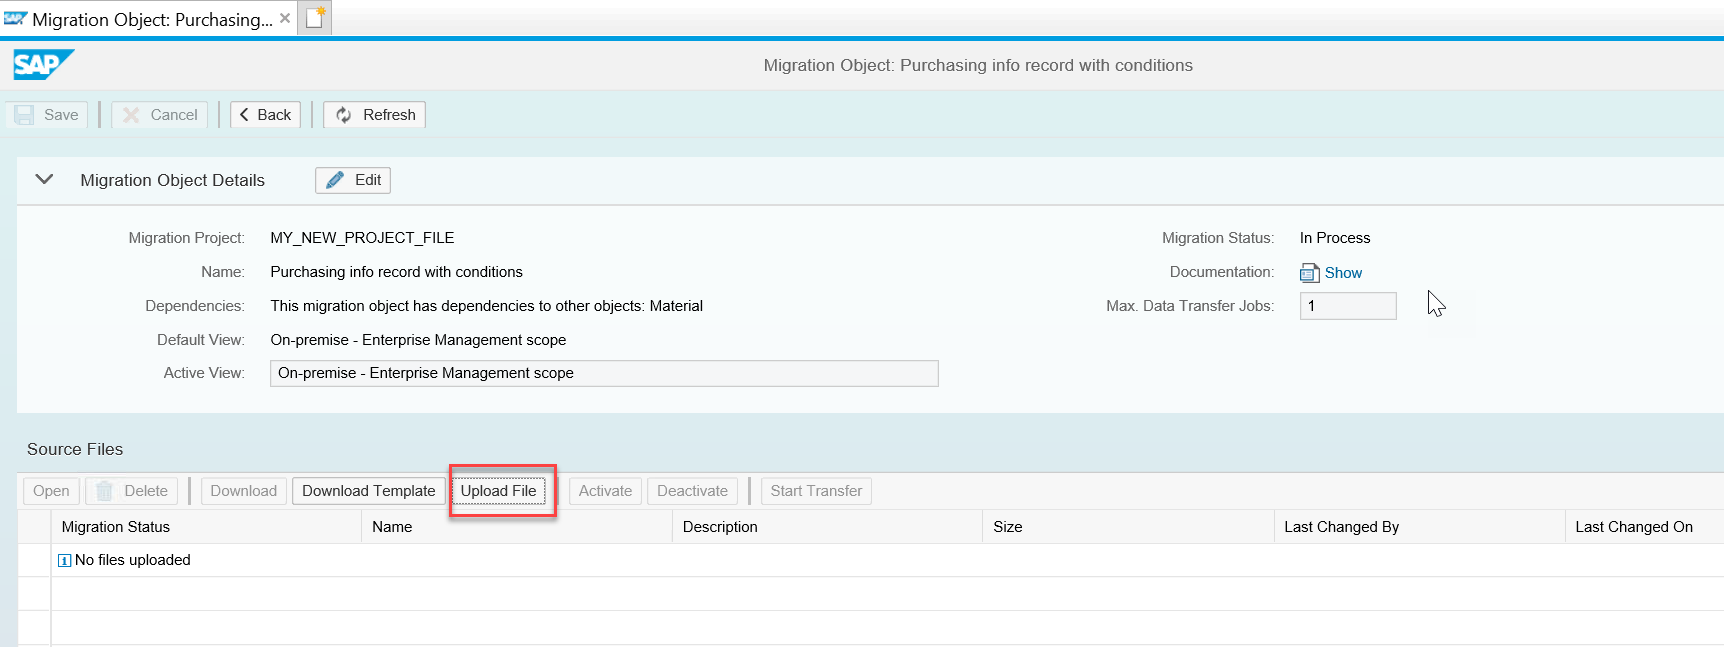
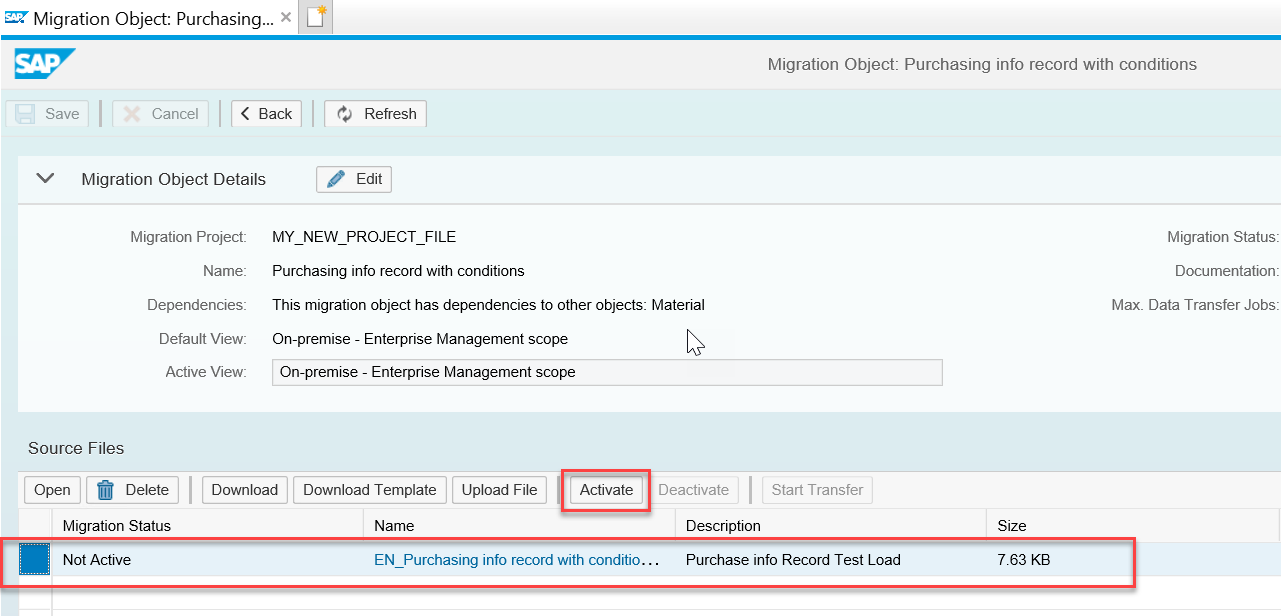
4. Start Transfer
Once your template with data is ready and uploaded to the LTMC portal, it is time to initiate the transfer.
- Select the file you just uploaded and click on Activate to activate the transfer.
- After activation, you will notice that the Start Transfer button becomes highlighted. Click Start Transfer to proceed.
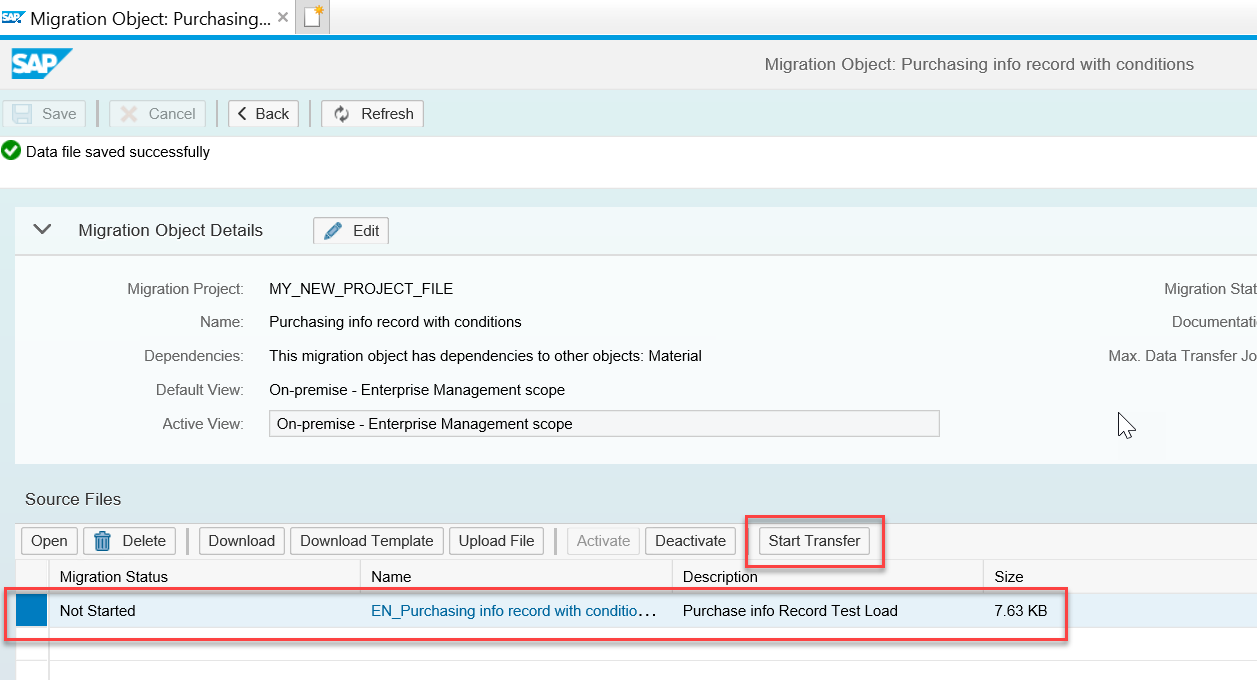
- Validation of the data will begin (note that this is not validation against S4HANA). The validation process may take some time. You can ignore any warnings that appear during this phase.
- You may encounter some errors if the data is entered incorrectly, such as a date not being in the correct format, or if decimal or character data is placed in an integer field.
- In such cases, you will need to correct the data in the file and start the process from the beginning. Delete the previously uploaded file, re-upload the corrected file, and then proceed by clicking Activate and Start Transfer.
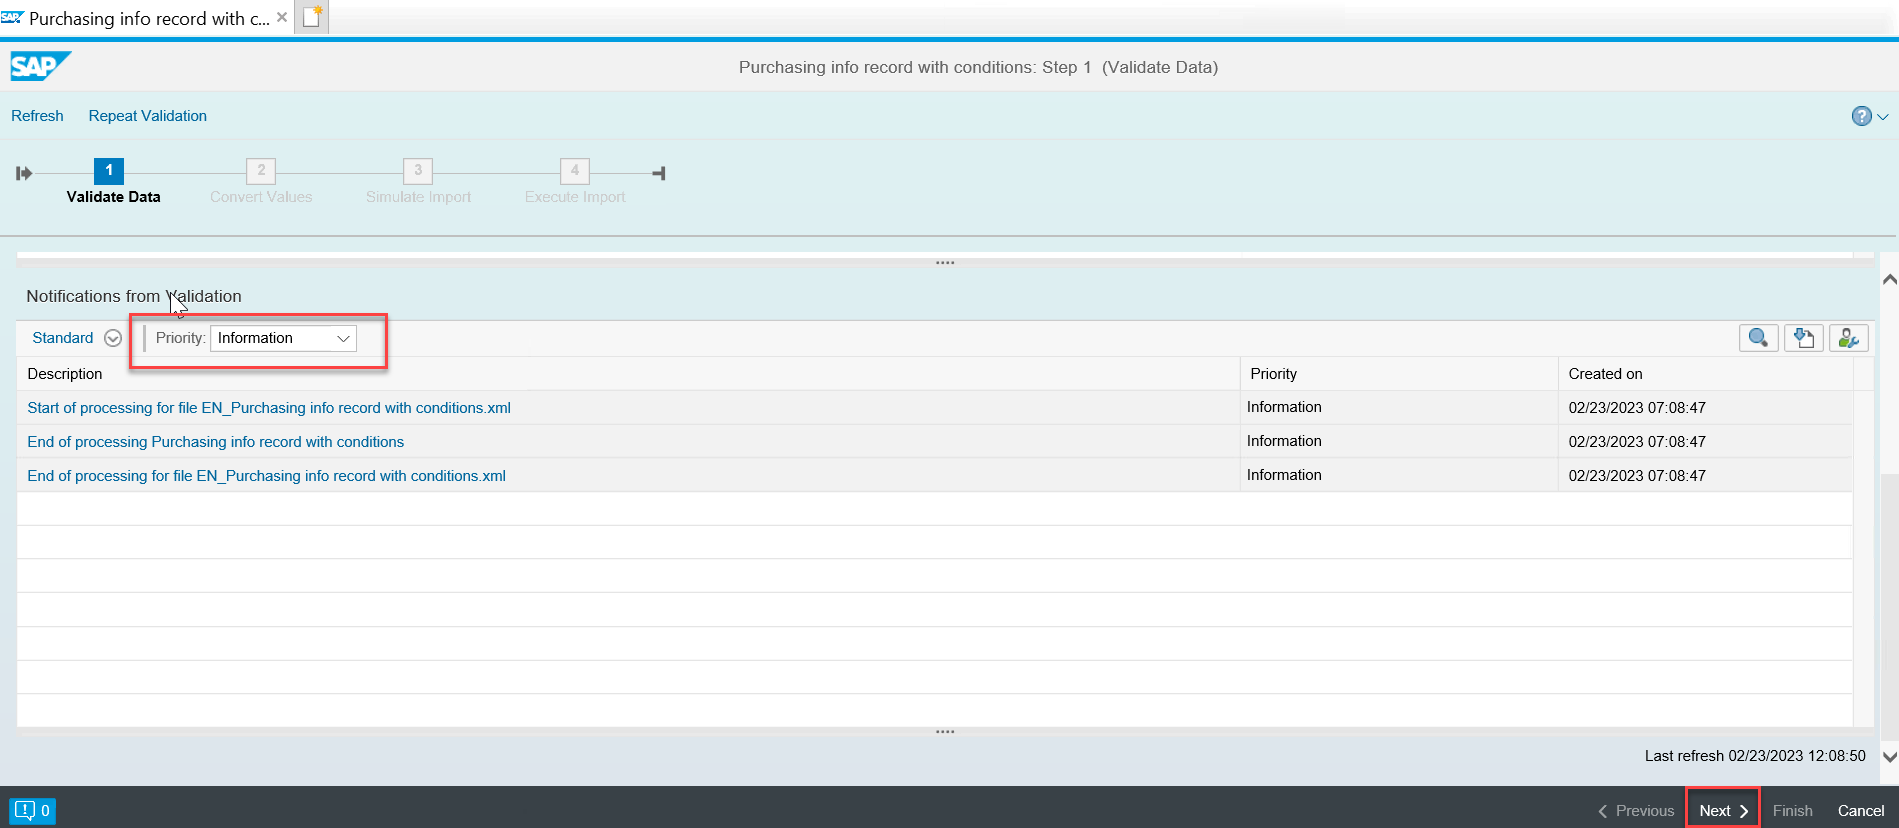
- If no errors are encountered, you will see Information in the dropdown.
5. Field Mapping
This is a crucial step. LTMC checks your input and validates the available values in S4HANA. If a value you have entered in your file does not exist in S4HANA, it will prompt you to enter the mapping manually. If a matching value is found, LTMC will automatically perform the mapping, though you can modify the mapping if needed.
- Select All from the dropdown menu, then click on Confirm Mapping Values to initiate the auto-mapping process.
-
 Signifies that mapping is required, either through auto-mapping or manual mapping.
-
 Indicates no action is required, as the field is free-text.
-
 Shows that mapping has been found and no further action is necessary. However, you can still change the mapping if needed.
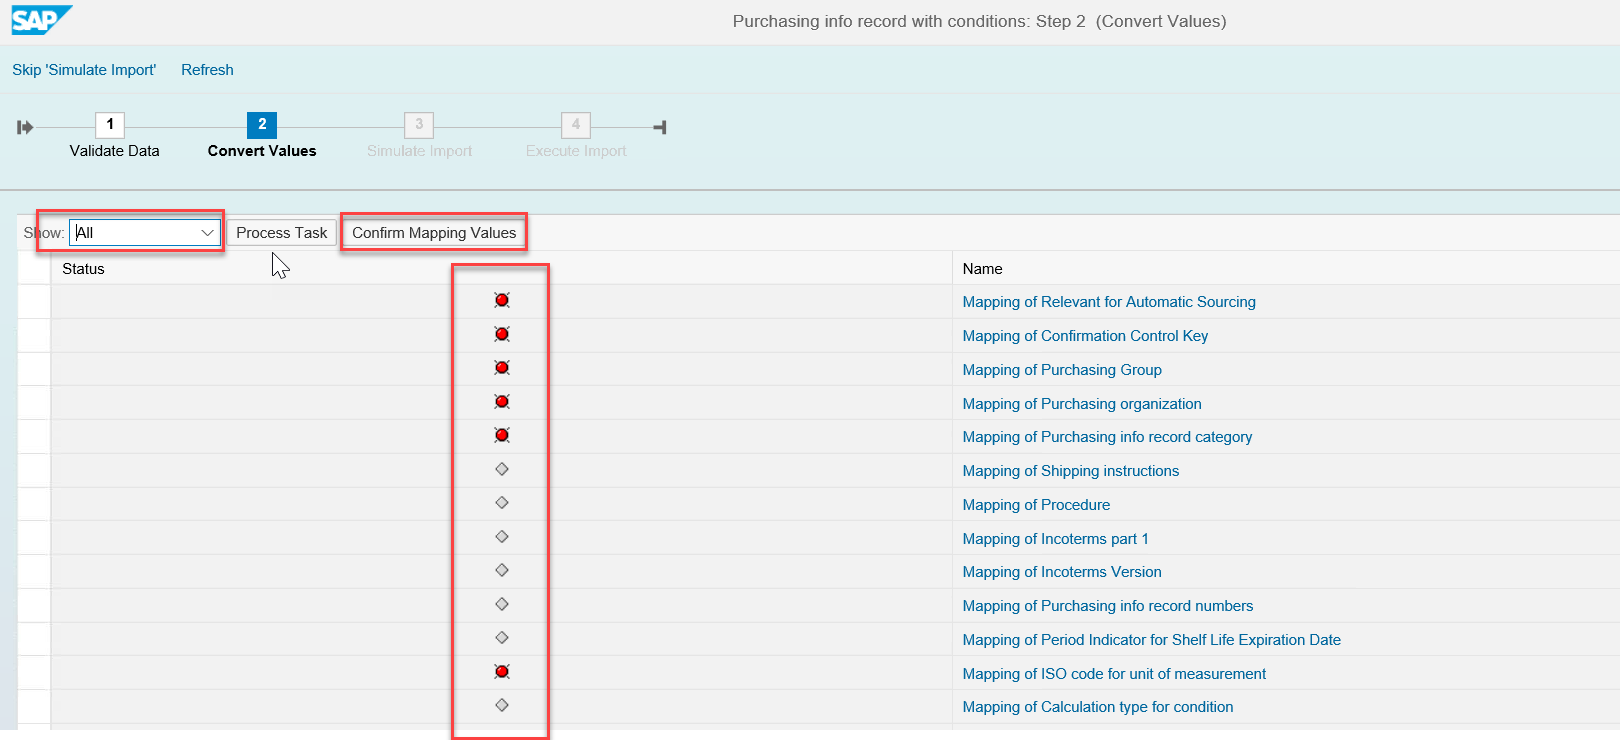
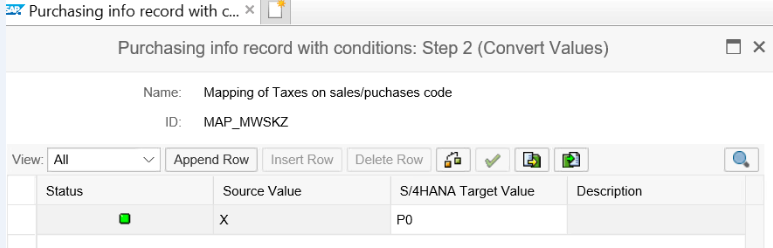
In case any of the fields are left without auto-mapping, you will need to map them manually.
- Click on the field name highlighted, then select the appropriate value from the S4HANA Target Value dropdown. You will notice the icon will turn green once the mapping is complete. Afterward, click Save.
- All the red icons will turn to green once the mapping is complete. You can now proceed further. Click Next.
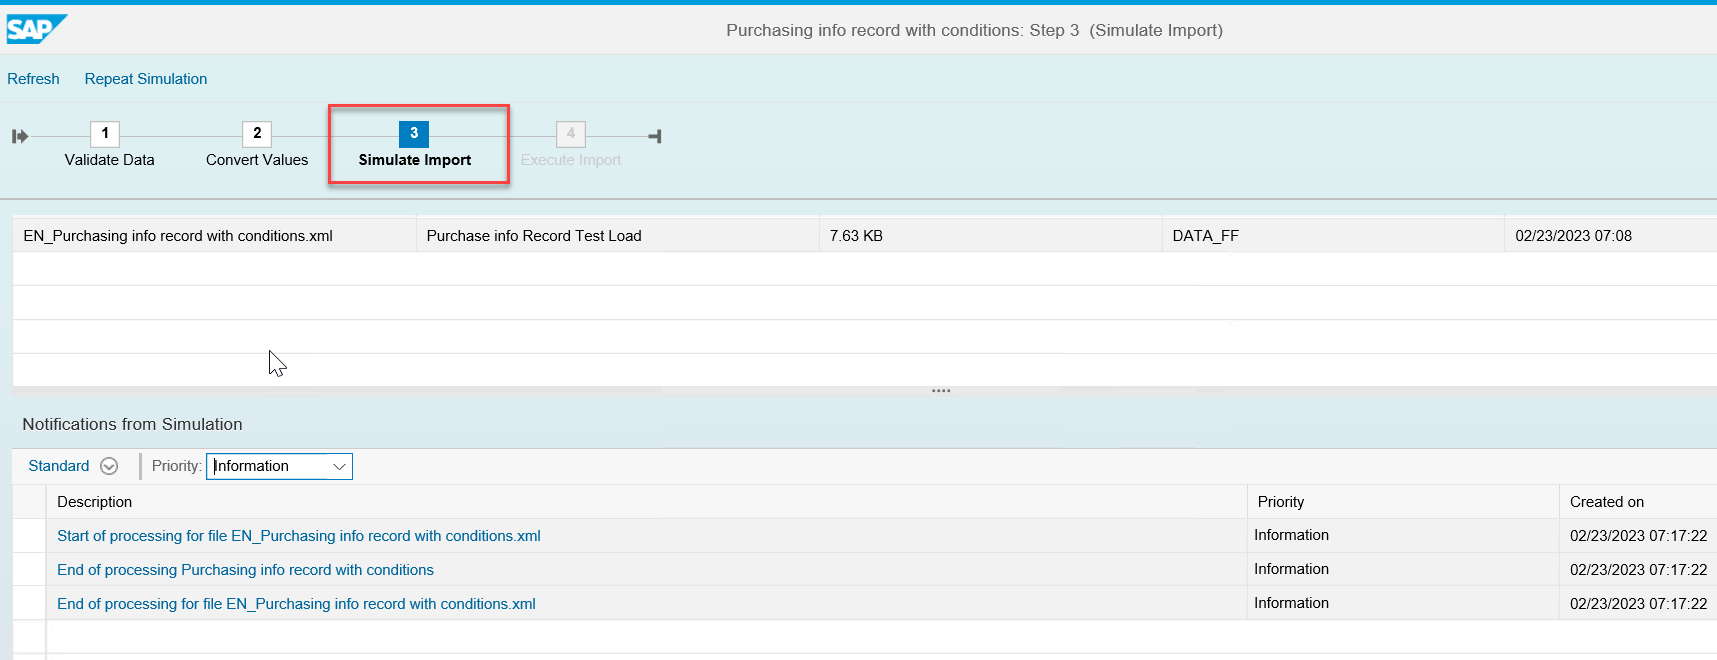
6. Data Simulation
The simulation step is designed to check your input against S4HANA. If the system detects any issues with the data or finds that the settings in S4HANA are not aligned with the input, you will be notified at this stage. If no errors are encountered, the simulation will complete with Information in the dropdown. Once the simulation is complete, click Next.
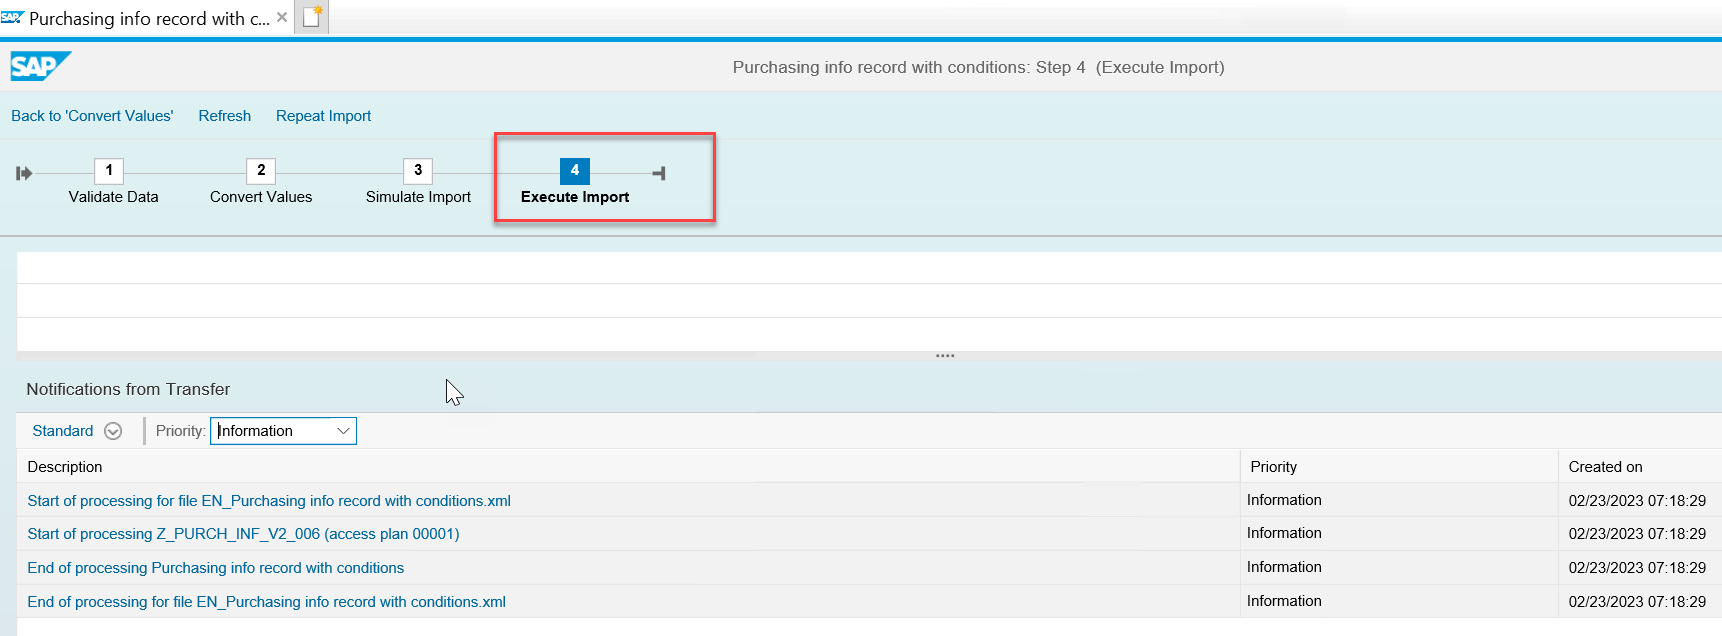
7. Data Import
Once all the steps have been completed without any errors, you are ready to begin the data import. This step will create the data in S4HANA. Once the process is complete, click Finish.
Data Validation will be done on every steps, if any error encountered during the process on any step if error is related to data, you will then need to correct the data in the file, kill the session,
and start from the beging.
(Upload the file, Activate, Start Transfer, Mapping, Simulate and Import)